
Description
PicKit 3 Price in Pakistan | Dspic30f2010 Programmer with Base
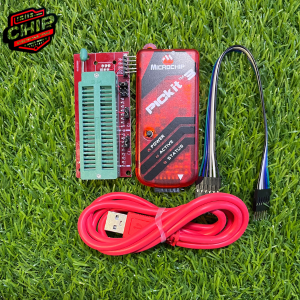
The Pickit 3 is a debugger and programmer from Microchip (now Microchip Technology Inc.) used for flashing and debugging PIC® and dsPIC® microcontrollers. It connects to a PC via USB and interfaces with the target microcontroller using ICSP (In-Circuit Serial Programming).Chip.pk give Best Pickit 3 Price in Pakistan.
Programming the DsPIC30F2010 using Pickit 3
To program the dsPIC30F2010 with the PICkit 3, follow these steps:
1. Hardware Connections
The PICkit 3 connects to the dsPIC30F2010 via the 5-pin ICSP header:
| PICkit 3 Pin | dsPIC30F2010 Pin | Function |
|---|---|---|
| 1 (MCLR/VPP) | MCLR (Reset) | Programming Voltage |
| 2 (VDD) | VDD (3.3V/5V) | Power Supply |
| 3 (GND) | GND | Ground |
| 4 (PGD) | PGD (ICSP Data) | Data Line |
| 5 (PGC) | PGC (ICSP Clock) | Clock Line |
⚠ Note:
- Ensure the target board is powered (either from PICkit 3 or an external supply).
- If using external power, disable the PICkit 3 power option in the software.
2. Software Setup
You need MPLAB X IDE (or MPLAB IPE) installed:
- Download MPLAB X IDE from Microchip’s website.
- Install the device support pack for dsPIC30F2010.
3. Programming Steps
Using MPLAB X IDE:
- Open MPLAB X IDE.
- Create a new project (File > New Project).
- Select Standalone Project, then choose dsPIC30F2010 as the device.
- Select PICkit 3 as the programmer.
- Write your code (or import an existing
.hexfile). - Click Make and Program Device (or use the Program button in MPLAB IPE).
Using MPLAB IPE (Independent Programming Environment):
- Open MPLAB IPE.
- Select PICkit 3 as the tool and dsPIC30F2010 as the device.
- Load your
.hexfile. - Click Program.
4. Troubleshooting
- “No device detected”: Check ICSP connections (MCLR, PGD, PGC).
- Power issues: Ensure the target board has stable power (3.3V/5V).
- Driver problems: Reinstall PICkit 3 drivers if needed.
Conclusion
The PICkit 3 is a reliable tool for programming dsPIC30F2010. Ensure correct ICSP connections, proper power supply, and the right software setup for successful programming.
Complete Guide to Programming dsPIC30F2010 with PICkit 3
This guide covers hardware setup, software configuration, programming steps, debugging, and troubleshooting for the dsPIC30F2010 using PICkit 3.
1. Required Components
- PICkit 3 Dspic30f2010 Programmer
- dsPIC30F2010 Microcontroller
- Breadboard / Custom PCB (with proper power supply)
- USB Cable (for PICkit 3)
- 10μF Capacitor (optional, for stability on MCLR)
2. Hardware Connections (ICSP Pinout)
The PICkit 3 connects to the dsPIC30F2010 via the 5-pin ICSP interface:
| PICkit 3 Pin | dsPIC30F2010 Pin | Function |
|---|---|---|
| 1 (MCLR/VPP) | MCLR (#1) | Programming Voltage (~13V) |
| 2 (VDD) | VDD (#20) | Power Supply (3.3V/5V) |
| 3 (GND) | GND (#19) | Ground |
| 4 (PGD) | PGD/RB7 (#28) | Data Line (ICSPDAT) |
| 5 (PGC) | PGC/RB6 (#27) | Clock Line (ICSPCLK) |
🔹 Additional Notes:
- If using external power, disable “Power target from PICkit 3” in MPLAB.
- A 0.1μF decoupling capacitor between VDD & GND improves stability.
- A 10μF capacitor on MCLR helps prevent reset issues.
3. Software Setup
A. Install Required Tools
- MPLAB X IDE (Download Here)
- XC16 Compiler (Download Here)
- PICkit 3 Drivers (Installed automatically with MPLAB X)
B. Create a New Project in MPLAB X
- Open MPLAB X IDE → File → New Project.
- Select Standalone Project → Click Next.
- Choose dsPIC30F2010 → Click Next.
- Select PICkit 3 as the hardware tool → Click Next.
- Choose XC16 as the compiler → Click Next.
- Name your project → Click Finish.
4. Writing & Compiling Code
A. Sample Blink LED Code (dsPIC30F2010)
#include <xc.h>

// Configuration Bits (Set in MPLAB X Configurations)
#pragma config FOSC = FRC      // Internal Fast RC Oscillator
#pragma config WDT = OFF       // Watchdog Timer OFF

#define LED LATBbits.LATB0     // LED on RB0

void delay_ms(unsigned int ms) {
    while (ms--) {
        __delay32(16000);      // Approx 1ms @ FRC (7.37MHz)
    }
}

int main() {
    TRISB = 0x0000;           // Set PORTB as output
    LATB = 0x0000;            // Clear PORTB

    while (1) {
        LED = 1;              // Turn ON LED
        delay_ms(500);
        LED = 0;              // Turn OFF LED
        delay_ms(500);
    }
    return 0;
}
B. Compile the Code
- Click Clean and Build (Shift+F11) to compile.
- If successful, a
.hexfile is generated.
5. Programming the dsPIC30F2010
- Connect PICkit 3 to PC & dsPIC30F2010.
- Click Make and Program Device (F11) in MPLAB X.
- If programming succeeds, you’ll see:
Programming/Verify complete
- The LED should now blink at 500ms intervals.
6. Debugging with PICkit 3
To debug your code:
- Right-click the project → Set as Main Project.
- Click Debug Project (Ctrl+F5).
- Use Breakpoints, Watches, and Step Debugging.
7. Common Issues & Fixes
| Problem | Solution |
|---|---|
| “No device detected” | Check ICSP connections (MCLR, PGD, PGC) |
| “Target VDD not detected” | Enable external power or check voltage |
| Programming fails randomly | Add a 10μF capacitor on MCLR |
| PICkit 3 not recognized | Reinstall drivers or try another USB port |
8. Alternative: Using MPLAB IPE (Quick Programming)
If you only need to flash a .hex file:
- Open MPLAB IPE.
- Select PICkit 3 and dsPIC30F2010.
- Load the
.hexfile → Click Program.
Conclusion
- PICkit 3 is a reliable programmer for dsPIC30F2010.
- Ensure correct ICSP wiring and power supply.
- Use MPLAB X IDE + XC16 for development.
- Debugging is possible with breakpoints & step-through.
Customer Support:-
- Available 24/7
- Phn # 03091416242
- Mail # Cpakstore@gmail.com
Package Include:-
- 1 X Dspic30f2010 Programmer Pickit 3
Social Media:-

Reviews
There are no reviews yet.